Namkos Announcement Bar
Our Shopify announcement bar helps you highlight promotions and updates across every page. It installs in minutes, is lightweight, and stays on-brand with fully customisable styles.
Turn Visitors Into Buyers With Our Announcement Bar
Highlight your best deals – put promotions front and center.
Catch eyes instantly – with motion, color, and clear messaging.
Drive more sales – turn casual visitors into paying customers
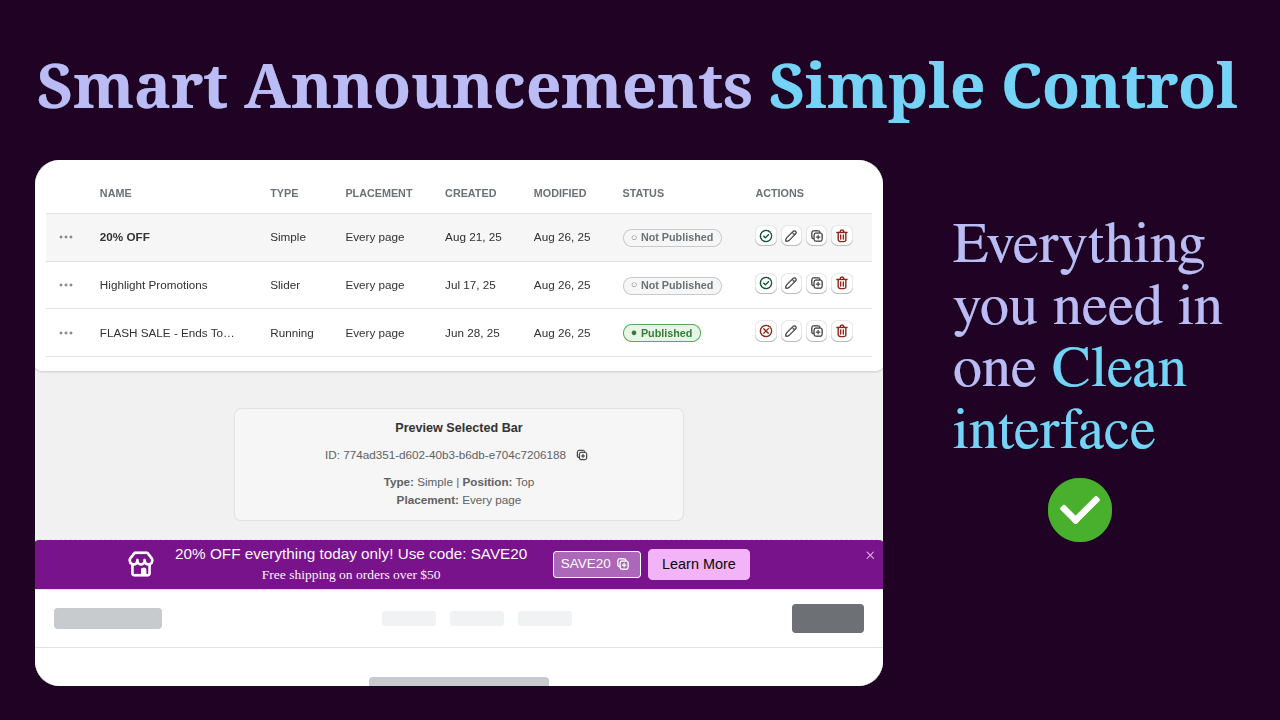
Seamless Bar Management
Manage all bars in one place – publish, edit, duplicate, or delete with ease.
Preview instantly – see exactly what your customers will see.
Clean interface – everything you need at a glance, no clutter.
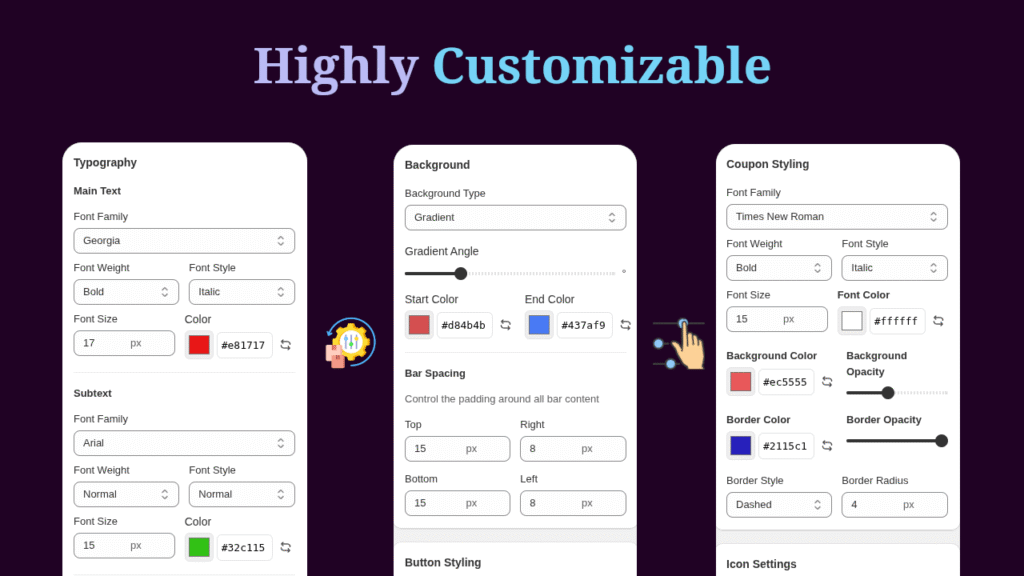
Built for Your Style
Full control over design – adjust fonts, colors, spacing, and backgrounds.
Brand it your way – match every detail to your store’s unique look.
Advanced styling options – from typography to coupons and icons.
Powerful Ways to Announce
Slider Bar – Rotate multiple announcements in one bar, perfect for highlighting several promotions at once.
Running Bar – Grab attention with animated, scrolling messages that create urgency.
Simple Bar – A clean, static message that delivers your promotion clearly and effectively.

Setup & Controls
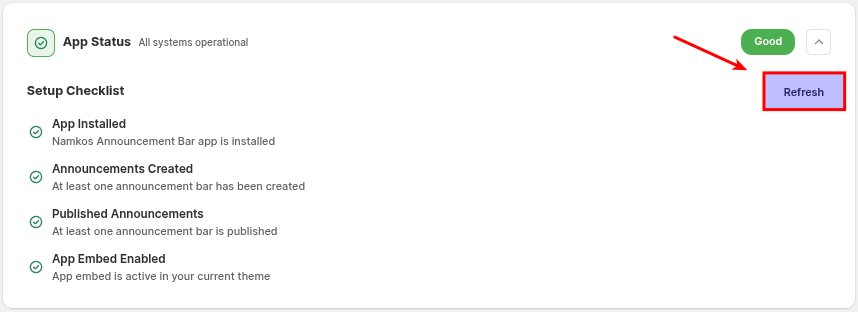
This section shows the overall health of your app.
✅ All checks must be green for the app to function properly.
The Refresh button lets you rescan the app to update the checklist in real time.
👉 Use this area to confirm your app is installed, announcements are created and published, and the app embed is active.
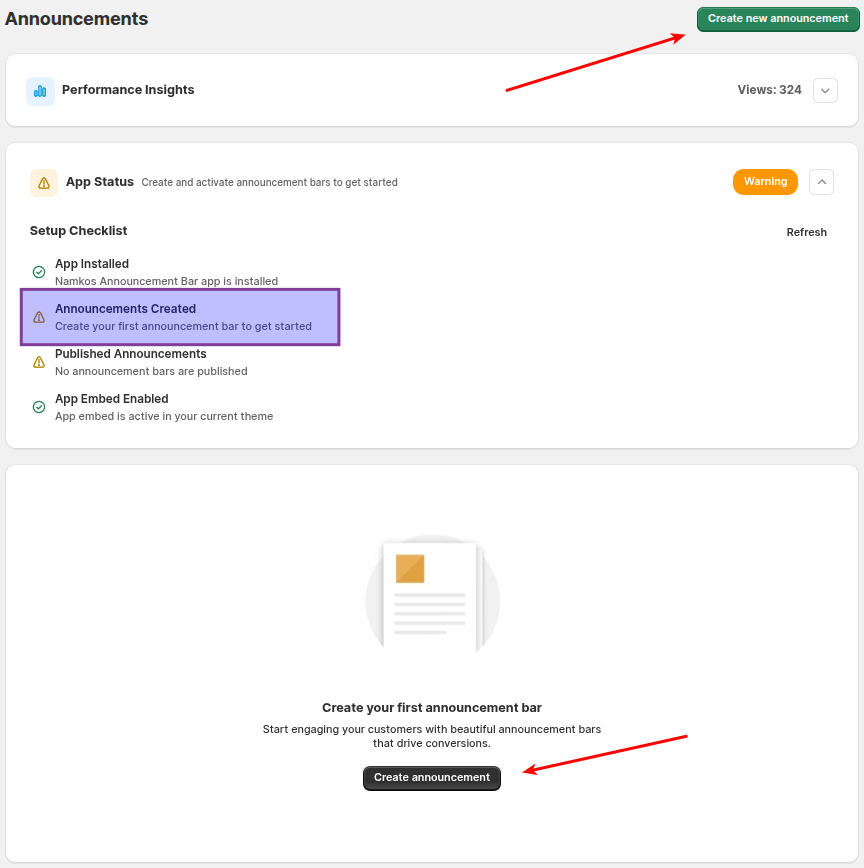
When the App Status shows a warning, it means no announcement bars have been created yet. To get started, click Create new announcement at the top or Create announcement at the bottom.
Use either button to set up your first bar and remove the warning.
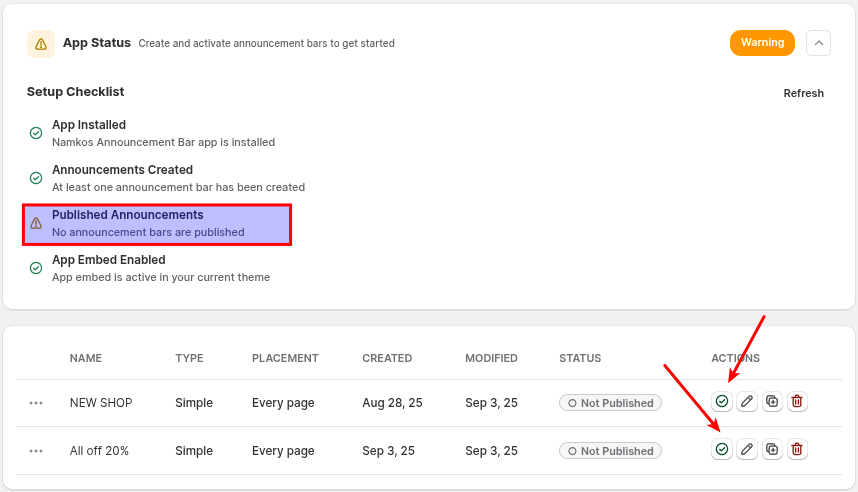
This means you’ve created announcement bars, but they are not published yet. Until at least one bar is published, nothing will display on your storefront.
Solution:
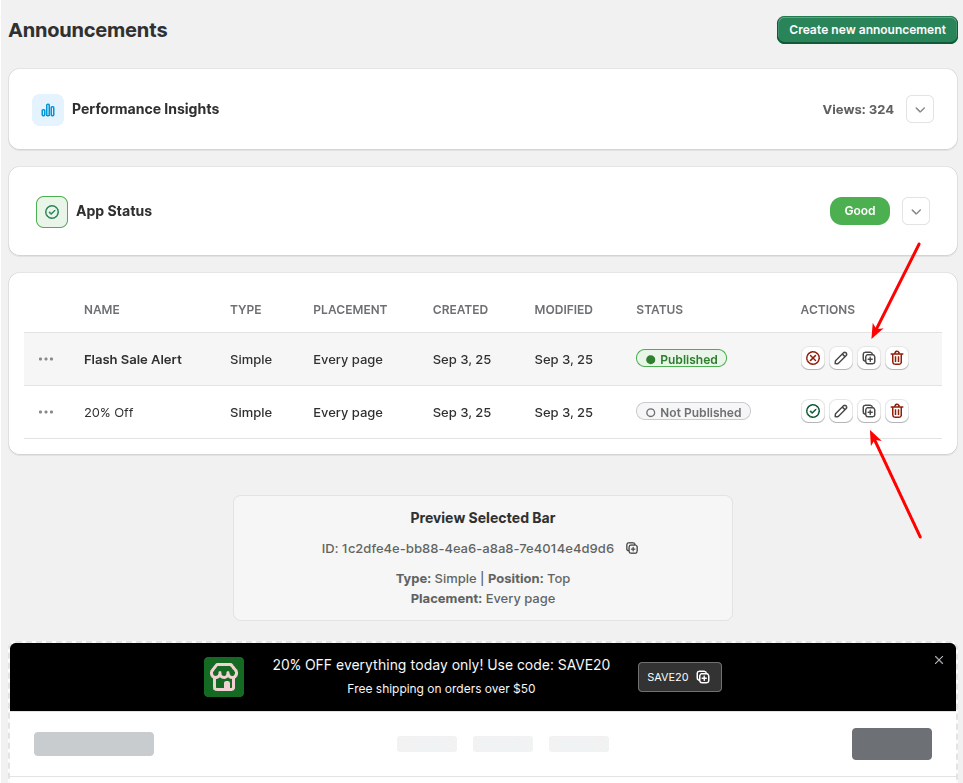
1. Go to the Actions column in your announcement list.
2. Click the ✅ Publish icon next to the bar you want to activate.
3. Once published, your announcement bar will appear live on your store.
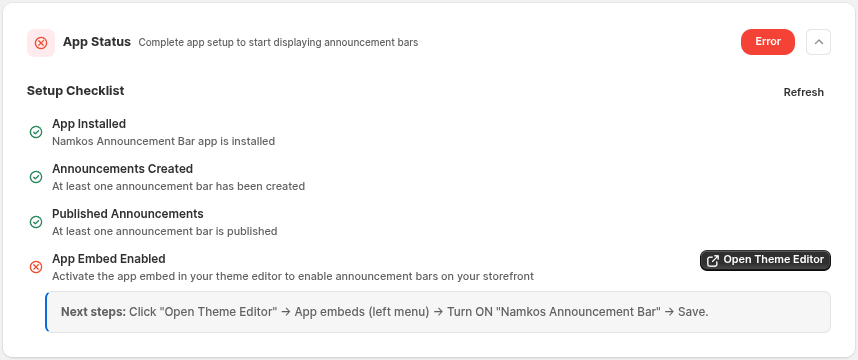
If you see this error, it means the Namkos Announcement Bar app has been installed and your announcements are created, but the app is not yet active on your storefront. To fix this, you need to enable the app embed in your Shopify theme editor.
Solution:
1. Click Open Theme Editor.
2. In the left menu, go to App embeds.
3. Switch ON “Namkos Announcement Bar”.
4. Click Save on the right top corner.
Once enabled, your announcement bars will appear live on your store.
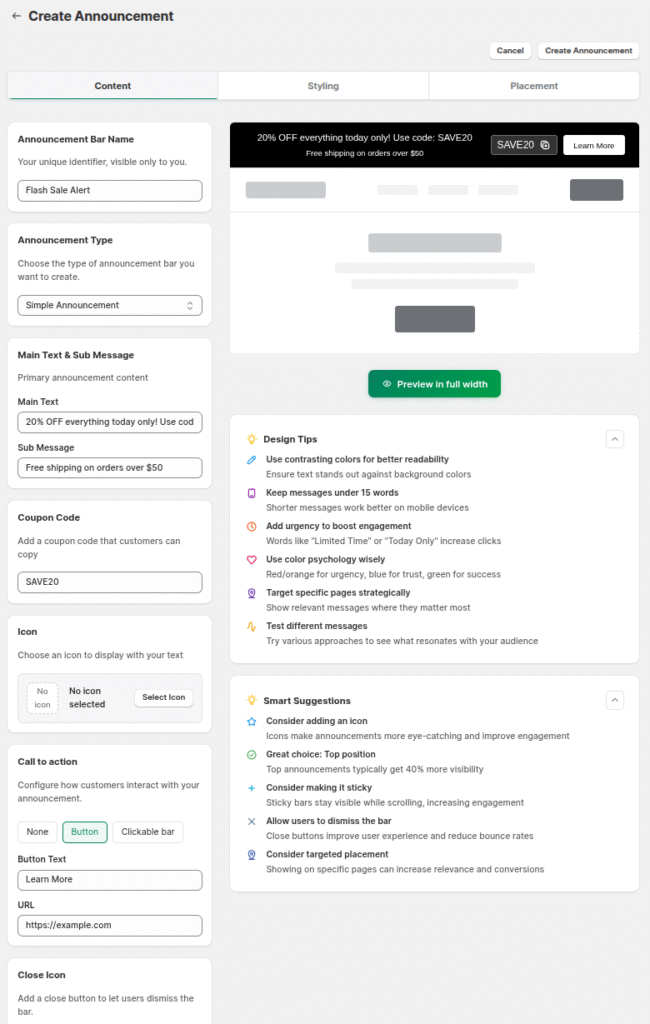
This is where you set up the main details of your announcement bar. Fill out the fields on the left, and use the live preview on the right to see changes instantly.
Fields on the left:
Announcement Bar Name – Internal name, visible only to you.
Announcement Type – Choose Simple, Running, or Slider bar styles.
Main Text & Sub Message – The main message customers see.
Coupon Code – Add a code that shoppers can copy.
Icon – Select an icon to display next to your text.
Call to Action – Choose None, Button, or Clickable bar and add URL.
Close Icon – Option to let users dismiss the bar.
On the right side:
Live Preview – Instantly see how your bar looks. Use “Preview in full width” to check the full layout.
Design Tips – Suggestions for improving readability and engagement.
Smart Suggestions – Extra guidance like adding an icon, sticky bar, or targeted placement. Tips can be collapsed if not needed.
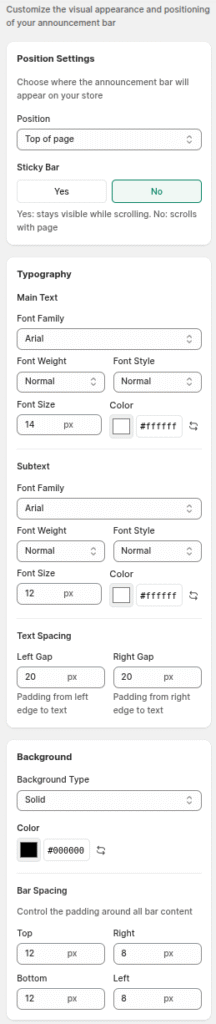
This tab lets you fully customize the look of your announcement bar, including fonts, colors, spacing, backgrounds, buttons, coupons, and icons. Options for CTA buttons or coupons only appear if they were added in the Content tab.
👉 Use these settings to match your bar perfectly to your store’s style.
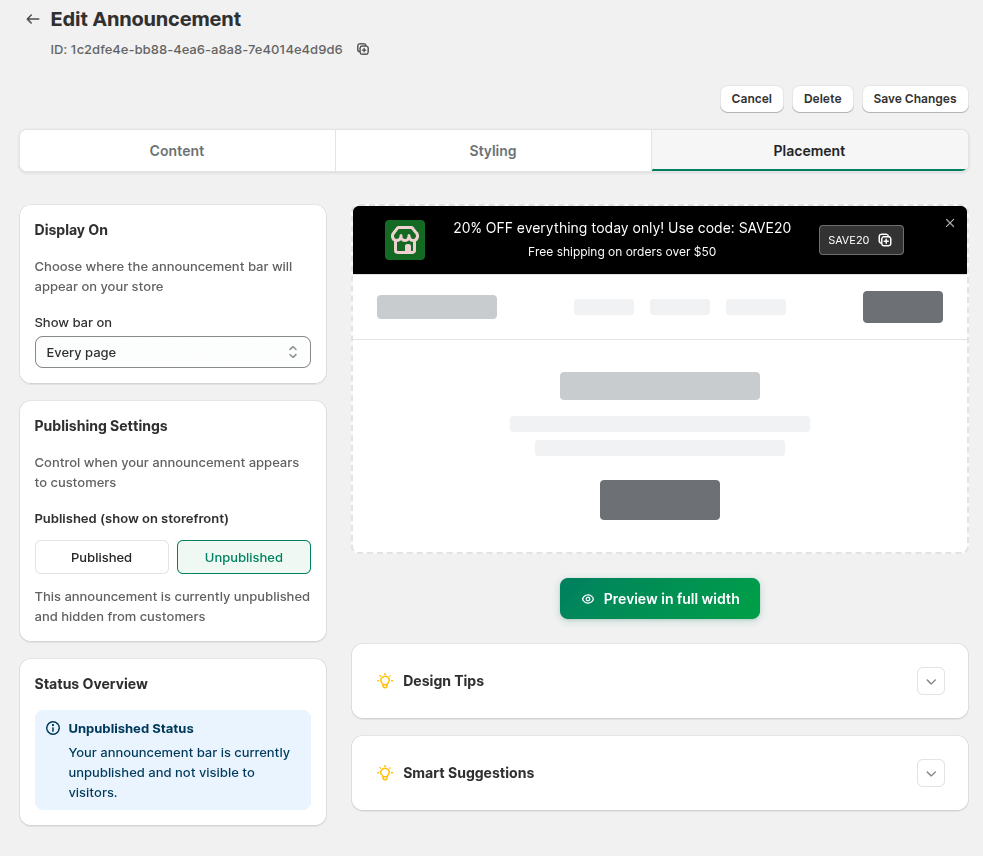
The Placement tab controls where your announcement bar will appear in your store.
Display On options: Every Page, Home page only, All Product pages, Specific Products, All Collection pages, Specific Collections, and Cart Page.
Publishing Settings – Switch between Published and Unpublished to control if the bar is live.
Status Overview – Shows if the bar is currently visible to customers.
You can run multiple announcement bars at the same time on different pages for maximum flexibility.
To remove an announcement bar, click the trash bin icon in the Actions column.
⚠️ Important: Once deleted, an announcement bar cannot be restored or reverted. If you think you might use it again, consider unpublishing instead of deleting.
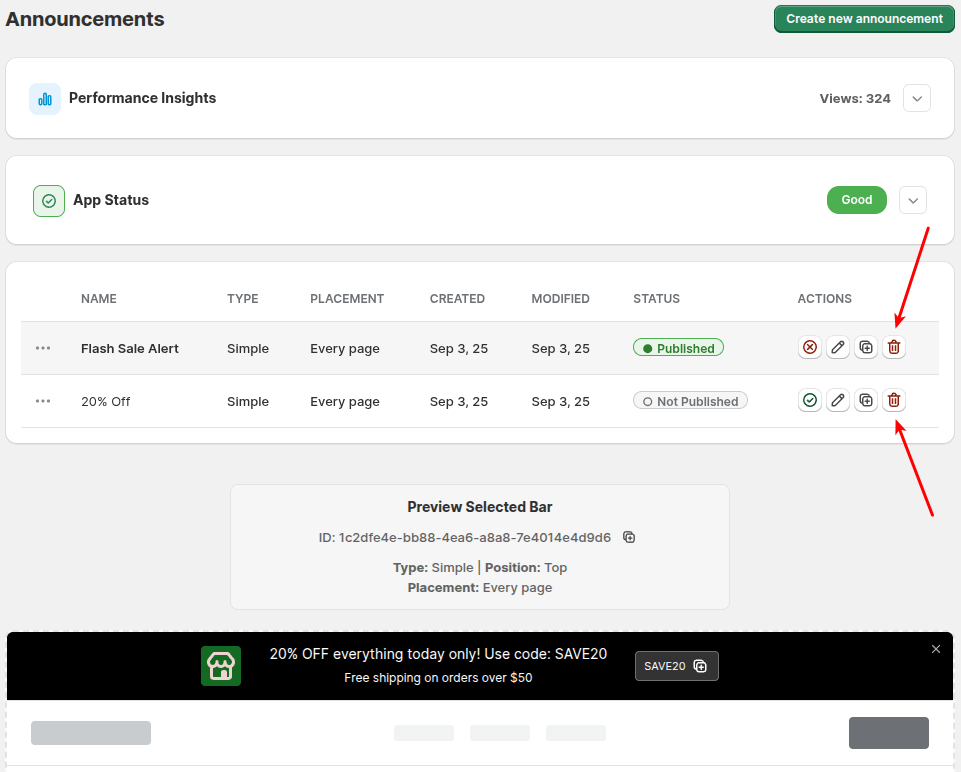
You can quickly create a copy of an existing bar by clicking the duplicate icon in the Actions column.
This is useful when you want to reuse the same design but make small changes, such as updating text, coupons, or promotions.
👉 Duplicating saves time and keeps your settings consistent across multiple campaigns.
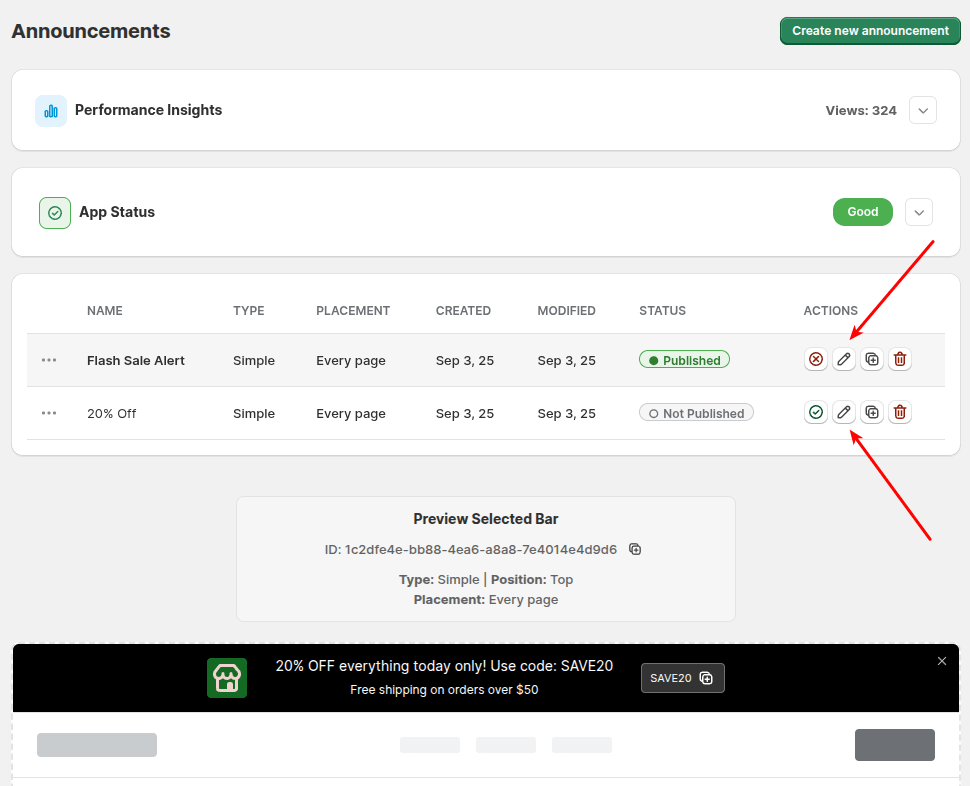
To update an existing bar, click the pencil (edit) icon in the Actions column.
From here you can adjust content, styling, or placement settings without needing to recreate the bar. All changes must be saved before they take effect.
👉 Editing lets you quickly refresh messages or update promotions while keeping the same design.
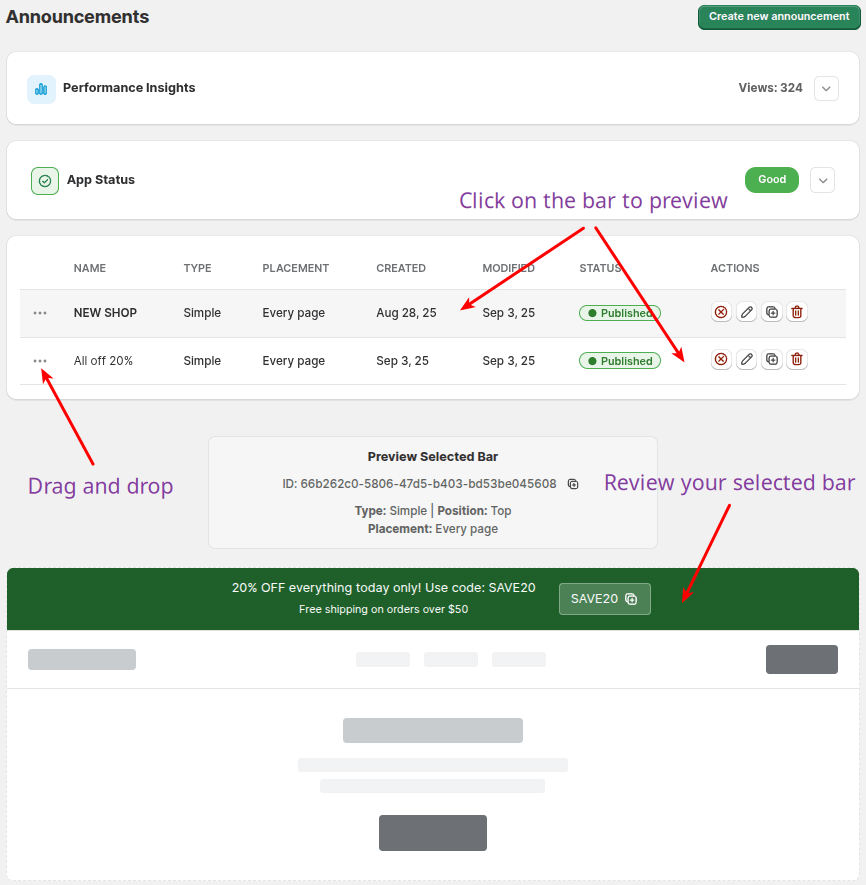
On the main page, you can:
Click on a bar from the list to preview it below.
Drag and drop bars to reorder them.
Review your selected bar to confirm it’s the correct one before publishing.
👉 This ensures you always publish the right bar in the right placement.
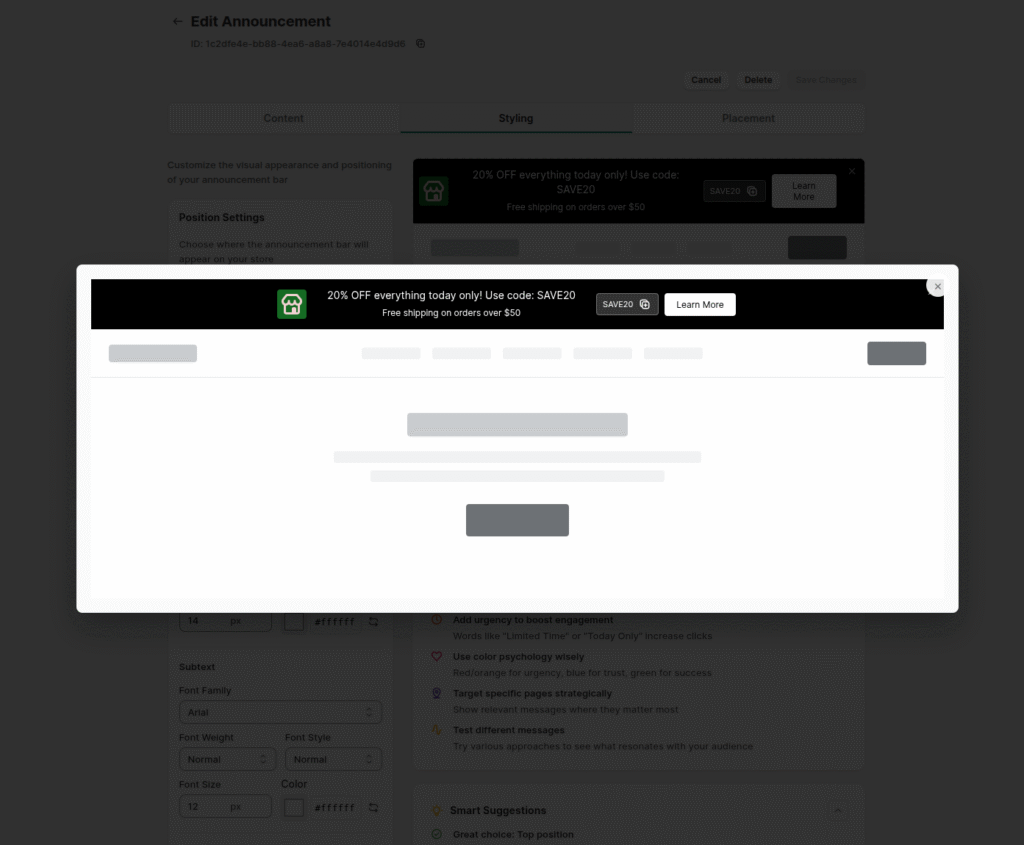
When editing an announcement bar, you can use the Preview in full width option to see how the bar looks across the entire storefront width.
This is especially useful if your bar includes a lot of content, buttons, or coupon codes—helping you confirm everything displays correctly before publishing.
👉 Use full width preview to ensure the design matches your store layout.
This section shows how your announcement bars are performing.
Views This Month – Tracks engagement for the current month.
Previous Month – Compare with last month’s performance.
Automatic Reset – Stats reset every month on the date shown.
👉 Each visitor can generate multiple views per session, so numbers reflect total impressions.
